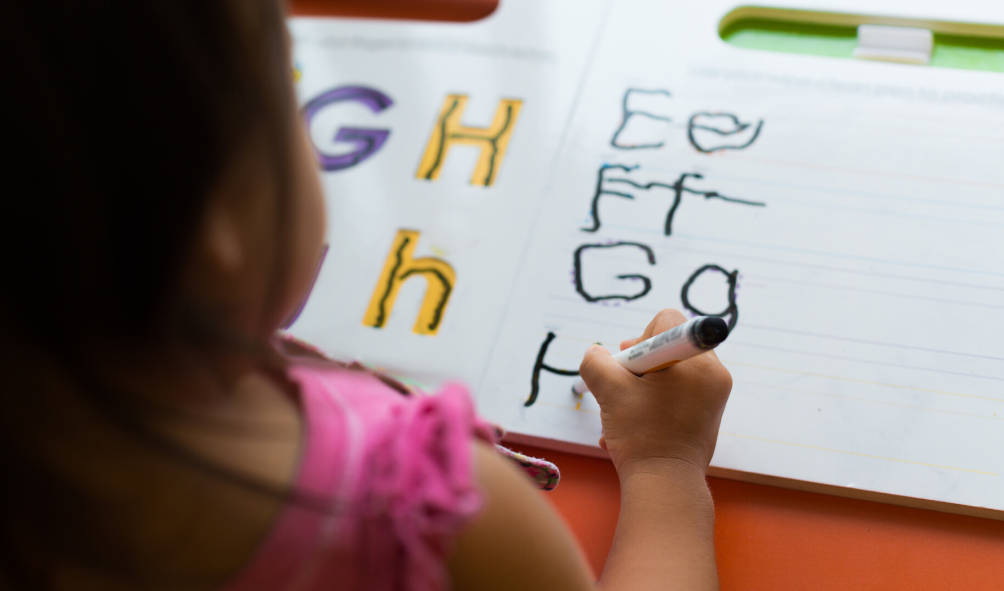
Do you remember when and how you learned how to tie your shoes? I was in kindergarten and my mom taught me. I remember practicing but don’t remember much more than that. With my limited memory, it seemed to come fairly easy to me. This could have been the case, but I also didn’t struggle with motor skills, visual perception, core strength, frustration management. If a child in your life does have difficulty in these areas, this could be a very challenging task. Read on for ways to help teach shoe tying to kids!
So when do kids need to learn how to tie their shoes?
Well, it depends on the child and family. Many teachers do not help children tie their shoes once in kindergarten and first grade. This is an incentive to learn. However, there are more and more shoes without laces and it could just be avoided given the options of shoes.
This is a good and bad thing. Shoes without laces are helpful for kids that have difficulty with the skills behind shoe tying to be independent in putting their shoes on. Shoes without laces might also prevent kids from learning how to tie a shoe because they just don’t have to. If you and your child decide that this is not a priority for whatever reason, you have my blessing. The energy and time spent in mastering this skill may be better spent elsewhere, and you get to decide that.
The Task
I first want to help you understand how complex this task actually is. Shoe tying requires fine motor strength and dexterity, visual perceptual skills, core strength and balance, bilateral coordination, attention, emotional regulation, direction following, sequencing. Honestly, I’ve probably missed something. Really challenging, right?
Now that you see that laundry list of abilities, it is clear why this task can be so hard for kiddos. The following are ways to break down the task into more digestible, attainable goals to successfully help your child tie shoes!
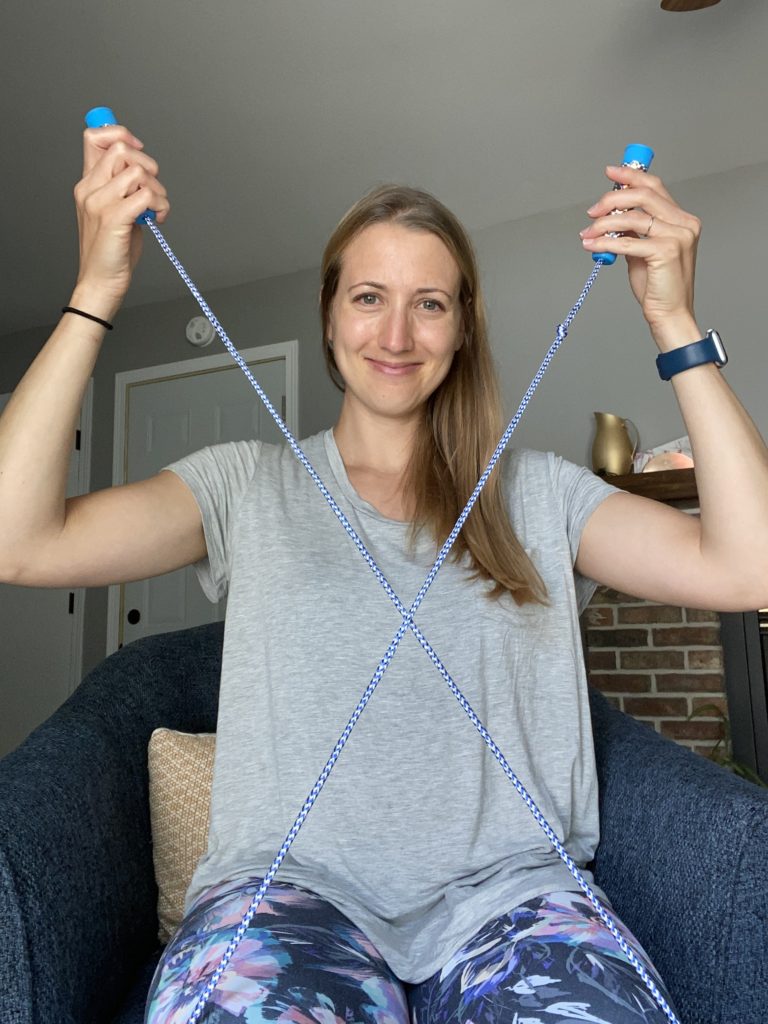
Equipment Needed
Start by getting a jump rope (or any rope like a jump rope) and have your child sit in a chair. This takes away a few components: core strength and balance and fine motor coordination.
Steps
The following are steps to try to progress toward tying a bow. Break each one down and practice one step at a time. This makes the task SO MUCH EASIER to work on. When I would do this with kids in the clinic, and I stopped at the first step, they looked at me like, “Really? That’s it? I can do that!” Yes, Buddy. Yes, you can. Practice each step to mastery and then build upon it.
Step 1: Make an X
Hold the two ends of the rope with both hands and cross them by switching hands. Encourage the same side of the rope to go over the top every time for consistency in motor pattern.
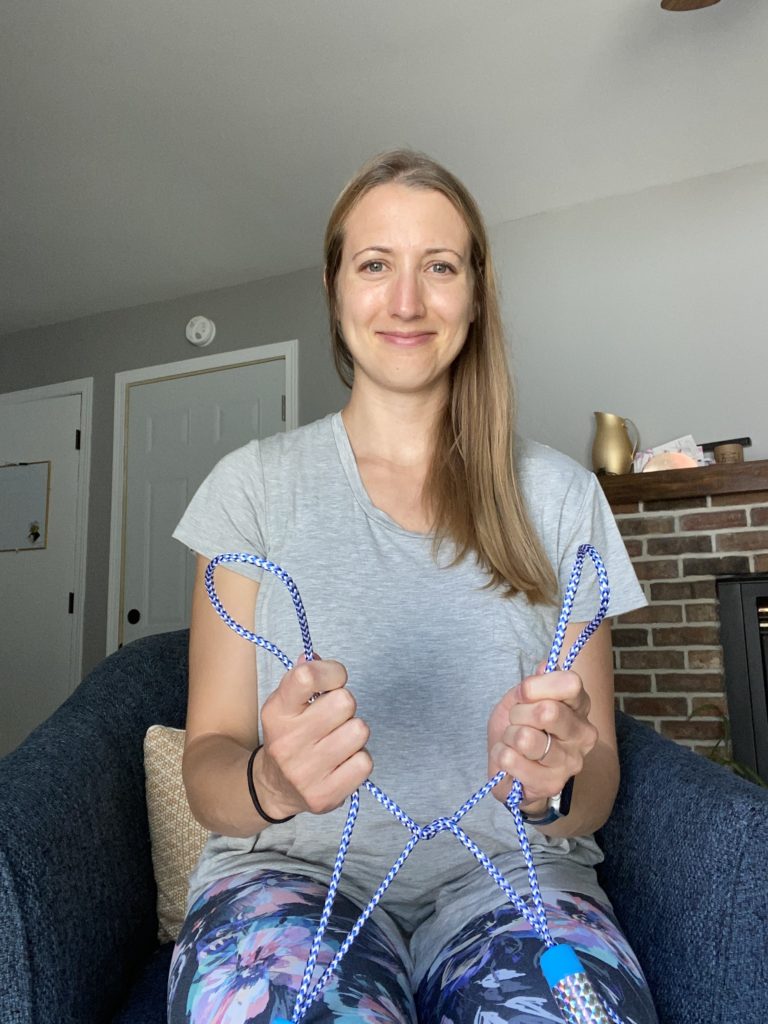
Step 2: Push through the window
Whichever rope is behind the other, bring it toward you and through the bottom “window” of your X. This is why I encourage having the same side be in the back every time. Then pull the ropes tight. Be sure to encourage arms pulling away from each other. Many kids pull up and then it doesn’t work. Cue them to pull away and down.
Step 3: Make 2 Loops
This can be tricky. Start by making one loop at a time. The first loop is easier as the child can use both hands to get it formed correctly. If it takes time to do one loop, stick at this step for some time until he masters it. When he makes the loop, encourage leaving a “tail” to set him up for success when he pulls the loops tight.
You can also help make the second loop and hand it to him when he’s ready for Step 4, then continue to work on making both loops.
Step 4: Repeat X and Window with Loops
I like the 2 loop method best because it repeats this visual perceptual task of bringing one side forward and pushing it through the window, just as it was done in Step 2. Repetition is nice for learning motor patterns. Then again, pull tight by pulling arms apart and down.
So there you have it. A way to introduce the concept and process of shoe tying without fully working on it with a shoe.
Ways to Progress
- Practice with long pipe cleaners so they hold their shape
- Try on a shoe, off of her body
- Color laces two different colors
- Use thick laces that are the “perfect” length
Ta-da! An easy way to break down a very daunting task! Tell me, how do you teach and practice shoe tying with your kiddos? I’m always looking for more tips and tricks.